Sunday, April 29, 2012

Pineapple fried rice, plus things in dirt

When I asked 101cookbooks what to do with the mizuna we got at the farmer's market today, I was surprised when this was what came up. But quite coincidentally there was a pineapple ready and waiting, because Lester found out that you can plant the pineapple top and it will grow another pineapple! Thus, pineapple fried rice for dinner. Add more or different veggies as you see fit—I would have added some thinly sliced carrot and some bite-sized chunks of green beans if they hadn't been a bit too far past their prime. The mizuna works well, with slightly earthy and bitter flavors to complement the tangy and sweet pineapple.


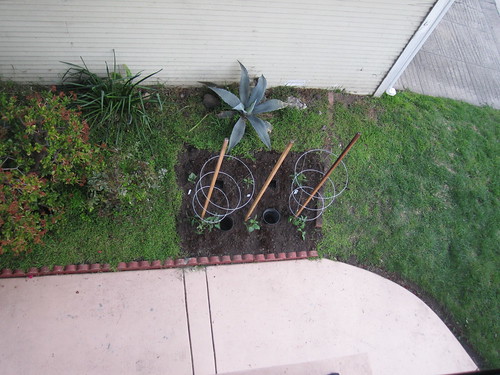
But before dinner, gardening time! We dug up a new, sunnier plot in the front yard and planted some starts from Spiral Gardens and the farmer's market folks. Pictured are Israeli cucumber, jalapeno, padron pepper, black brandywine tomato, tomatillo, and Rosalie's Early Orange tomato. Not pictured but also planted today: watercress by the drain spout, boysenberry behind the lemon tree, and an old-school herb called salad burnet next to the other flowering shrubs. Expect to see these guys popping up in recipes later in the summer.


1 c cashews
1/2 c coconut flakes
1/2 pineapple, cut into 1-cm slices
3 T soy sauce
1.5 T sriracha
1/2 T lime juice
2 T canola (or nuttier) oil
1 red onion, diced
2 eggs
6 cloves garlic, minced
volume of minced ginger equal to that of the garlic
1 green bell pepper, diced
2/3 c frozen peas
4 c cooked brown rice, at least a few hours old
1 bunch purple mizuna, leaves coarsely chopped
more soy sauce, hot sauce, and lime to taste

Heat a large cast-iron pan over medium-high (without oil). Toast the cashews and coconut without letting them burn, then transfer to a bowl and set aside. Add the pineapple slices to the pan and cook on both sides until grilled-looking, then transfer to a cutting board and chop into bite-sized chunks. Mix together the soy sauce, sriracha, and lime juice to make a sauce.

Add the oil and onion to the hot pan and saute for a couple minutes. Crack in the eggs and stir to scramble. Whenever things stick to the pan, from now until the end, add a splash of sauce (or a splash of water or oil if you run out of sauce). Add the garlic and ginger and saute for a couple minutes, then add the pepper and peas and saute for a couple more minutes. Add the rice and cook for about 10 minutes, stirring and scraping the bottom periodically. Turn off the heat and stir in the cashews+coconut, pineapple chunks, and mizuna. Taste and adjust the seasonings as needed.

Saturday, April 21, 2012

Strawberry marmalade scones

Like strawberry shortcake, but with the strawberries baked in and without the mess—great for picnics. Makes about 25 smallish scones.


1 c diced strawberries
1/4 c marmalade
1 T brown sugar
4 c flour
1/2 t salt
1/2 t cardamom
2 T baking powder
1/2 c shortening
1 c plain greek yogurt
1/2 c milk

Preheat the oven to 425F. Toss the strawberries with the marmalade and sugar, and let sit and macerate for 10 minutes. Pour the strawberries into a sieve set over a bowl, and let drain for another 10 minutes. Save the juice.

In a large bowl, combine the dry ingredients (flour through baking powder). Rub the shortening into the dry ingredients with your fingers. Add the yogurt, milk, and strawberries, and knead gently to make a dough dotted with evenly-distributed strawberry bits. Turn out onto a lightly floured surface and press into a rectangle at least 1 cm thick, folding over a couple times to create layers. Cut into your preferred sizes and shapes. Bake on an ungreased cookie sheet for 10-12 minutes until golden on top and bottom, then immediately transfer to a cooling rack.

While the scones are baking, see if the strawberry juice seems like a good consistency for a glaze as it is. If not, cook it down a bit, add some sugar, etc. Brush the baked scones with glaze as they cool. Any leftover glaze can be made into strawberry lemonade (pictured in the background).

Monday, April 9, 2012

Homemade matzah

This is matzah I actually enjoy. Shocking, I know! It's not as good as actual bread, of course, but it's much closer to a pita or tortilla than to a saltine cracker. And, by definition, it's fast—not more than 18 minutes from when water touches flour to when finished matzah comes out of the oven. It's also easy to make a large quantity, since you can roll out another batch while the last batch is baking (or make a double batch if you're a seriously fast roller). There's really no reason not to make this for all your leniently-kosher-for-Passover needs.


1.5 c flour, plus a bit for rolling
1/2 c water
toppings of your choice: salt, grated cheese, roasted garlic, sesame seeds, cinnamon sugar, etc

Preheat the oven as hot as it will go, at least 450F. If you have a pizza stone, preheat that in the oven too; if not, get out a baking sheet.

When the oven is preheated (and not before!), stir the water into the flour to form a stiff but workable dough. Put the dough on a lightly floured surface and roll it out as thin as it will easily stretch, making a rectangle about the size of a baking sheet. (You can even do the rolling right on your baking sheet if you want.) Poke the dough all over with a fork to stop it from puffing up in the oven, or don't poke if you don't mind some sacrilegious puffing. Sprinkle or spread with toppings, then cut into 2"-5" squares with a sharp knife.

If you're using a pizza stone, remove it from the oven, carefully place each piece of dough on it, then put it back in the oven; if you're using a baking sheet, just slide it into the oven. Bake for a few minutes until the first brown spots start to form. Actual baking time will depend on how hot your oven is, so keep a close eye on your first batch and use that baking time for later batches. Take the finished matzah out of the oven and immediately transfer it to a cooling rack or serving platter. Eat it fresh out of the oven (best), after cooling for a few hours (ok), or perked up in the toaster oven the next day (pretty good).


Sunday, April 8, 2012

A vegetarian seder menu

Thanks so much for coming, those who came! It's always a pleasure to share practices I care about with people I care about. (And even though I don't believe in the God parts, I do care about the celebration.) It's also a treat to provide and host a nice big meal like this, especially when the timing actually works out such that I'm just finishing cooking when people show up *and* I can put hot food on the table at the right point in the evening. Win all around.

haggadah:
(-) make your own!

appetizers and ceremonials:
(^) Homemade matzah
(*) Guacamole by Lester
(*) Asparagus egg salad (this time with green beans instead of snap peas)
(*) Charoset

the meal:
(~) Matzah ball soup (recipe on the box, in not-chicken broth)
(~) Roasted garbanzos and chard
(~) Matzah lasagna (with thinly sliced roasted eggplant)

dessert:
(-) Mocha chip ice cream
Truffles by Chris
TJ's meringues

preparation notes:
(-) Make a few days ahead of time.
(*) Mix up during the day, then keep in the fridge or on the counter.
(~) Do most of the prep during the day (mix and shape the matzah balls, completely make the garbanzos+chard, assemble the lasagna). Then do the final heating during the seder, only needing to step away from the action once or twice to check on things (cook the matzah balls, reheat the garbanzos+chard over low heat on the stove, bake the lasagna in the oven that's still warm from the matzah).
(^) Make as the guests are arriving.
(*) and (~) together make for a nice full day of chopping and stirring, so don't plan to do much else. But there's still time to go to dance class, pop to the shops for last-minute ingredients, and put the finishing touches on the haggadah.

Charoset

Or as LauraR termed it, God's kindness. The fig butter is a lovely way to deepen the flavor, especially if you're using a drinkable table wine (as I did) instead of some syrupy Manischewitz thing. Charoset goes well with matzah, maror (horseradish), or yogurt, depending on how you roll.


1/3 c red wine
2 t honey
2 T TJ's fig butter
1 t cinnamon
4 medium-small Pink Lady apples
1/2 c raisins
3/4 c toasted walnuts

Mix the wine, honey, fig paste, and cinnamon together in a large bowl. Finely mince each apple: I did it by hand without peeling, but many people peel and use a food processor. Either way, toss the minced apple bits into the wine as you go, before they start to brown. Also mince the raisins and walnuts, and toss those in too. Mix well until all the bits are coated but not swimming in wine, and adjust the spiciness and sweetness as you desire. This keeps better than you might expect, and you should definitely let sit for at least a few minutes before serving to let the apples soak up the wine.

Wednesday, April 4, 2012

Blood orange and Meyer lemon marmalade

I'm following this NYT recipe, with a few methods modifications as explained here and with Jaime's ladle-into-a-pyrex trick. The resulting procedure is loads easier than most other marmalade recipes I've seen: nothing complicated with saving the seeds, nothing time-consuming with letting the fruit soak overnight, nothing dangerous or awkward with hot jars. Plus it's delicious! As well as absurdly pink.


These amounts are intended to be equivalent by volume to 1 part orange slices, 1 part lemon slices, 2 parts water, and 1.5 parts (or a touch more) sugar, to make 2-2.5 parts marmalade. If your fruit doesn't add up to 4 cups, just scale the other amounts accordingly.

Also, from experience, your marmalade-making experience will go much more smoothly if you use a large pot. Like a really large pot, one that can hold about 3 times the volume of what you're putting in it (so >12 parts worth). It's quite a pain in the ass to scrub nicely caramelized marmalade out of a gas burner after your pot boils over. (But this is the batch that went flawlessly, thankfully.)

2 blood oranges
7 Meyer lemons
4 c water
3-3.5 c sugar
spoons, saucers, canning jars with lids, pot, thermometer, ladle, pyrex or other jug that's good for pouring

Prepare the fruit by slicing off the ends, cutting the fruit in quarters lengthwise (parallel to the inner pithy core), picking out the inner pithy core and any visible seeds, thinly slicing each quarter crosswise (so you can see several segment bits in every slice), and picking out any remaining seeds. Discard the seeds, pith, and ends.

Put a few saucers and a few spoons in the freezer, put your jars and lids in a loaf pan or two so the jars stand upright, and preheat the oven to 225F. This will all make more sense later.

Place the fruit and water in a large pot and bring to a boil. Simmer for 20 minutes, until the peels are soft (erring on the chewy side of soft, rather than the disintegrating side). Add the sugar and bring back to a low boil. The oven should be preheated by now, so put the pans of jars in to sterilize. Every few minutes, give the marmalade a stir and check the temperature. When the temperature gets up to about 217F, after half an hour or so, start checking whether the marmalade is done by scooping out a spoonful with one of your chilled spoons and letting it sit in the freezer on one of your chilled saucers for a couple minutes. The marmalade is ready if the spoon of marmalade gels and gets a wrinkly skin on top; if it's still runny, keep boiling and stirring and waiting and checking.

When you decide the marmalade is done, turn off the heat and remove the pans of jars from the oven. For each jar, ladle a jar's worth of marmalade into your pouring jug, pour the marmalade into the jar, place the flat part of the lid on top of the jar, and loosely screw on the screwy part of the lid. Wait for that satisfying popping sound of jars well sealed (but don't stand there waiting, it takes anywhere from a few minutes to a few hours). Screw the lids on the rest of the way, then store unopened jars in the pantry and open jars in the fridge.