Thursday, June 30, 2011

Chard and ricotta deep-dish pizza

Laura just got a large cast-iron pan, which is fantastic. Much as I love my tiny cast-iron pan (thanks Grandma Jeanne!) it's great to have a larger one around. One of the inaugural use cases she wanted to try is deep-dish pizza, with a nice bready crust that gets crispy around the edges from the oil in the pan. This crust, a consensus of several things around the internet, worked quite well. The chard-ricotta filling was a good idea but a bit bland--I'd recommend sprinkling a bit of a sharper cheese on top for extra bubble and zing.


crust for 2 deep-dish pizzas:
2 t yeast
1.25 c warm water
1/4 c olive oil
2 c bread flour
1.5 all-purpose flour
1 t salt

In the morning, combine flours and salt in a large bowl, and combine yeast and liquids in a small bowl. Pour the liquids into the flour and knead for several minutes to form a sticky dough. Cover the bowl with plastic wrap and put in the fridge.

About an hour before you want to bake the pizzas, take the dough out of the fridge and transfer it to a floured surface. Punch it down, cut it in half, and pat each half into a round about the size of your hand. Let sit and warm up while you prepare the toppings.

filling for 1 deep-dish pizza:
1 large or 2 small onions, thinly sliced
knob of butter
4 large leaves chard, cut along the stem then cut across the stem into thin strips
zest of 1 lemon
3/4 c ricotta
salt and pepper

Caramelize the onions in the butter. Add the chard and cook until wilted and dry. Stir in the lemon zest, ricotta, and seasonings.

to assemble:
Preheat oven to 450F and brush your dishes with olive oil (we used a large cast-iron pan and a 9" springform). Pull each round of dough into a uniformly-flat circle slightly larger than its pan, carefully transfer the dough into the pan, and press the extra dough up the sides to create the crust. Top with the toppings: spread the chard-ricotta mixture into the springform, and put something else on the cast-iron pan (such as the one pictured below with pizza sauce, sauteed spinach+mushrooms+garlic, and grated mozzarella). Brush the exposed crust with olive oil, and bake for about 20 minutes until the crust is golden and the cheese is bubbly. Cool for a few minutes before cutting each pizza into 8-12 small slices to serve.

Tuesday, June 28, 2011

Fig and tea bread

Yesterday Lester got some fresh figs and made fig-maple-walnut cake and served it with creme fraiche; it looked just like the linked picture and is fantastic and I'm eating more right now. For Yael's birthday tomorrow, I thought about making it again, but adapted this fig bread instead. It's nice too, spicier and softer, with little hints of crunchiness from the fig seeds. I thought the fennel might be weird but it's not at all.


1 c coarsely chopped fresh figs
1 c boiling water
1 PG Tips teabag
1/2 c white sugar
1/2 c brown sugar
1/2 c olive oil
2 eggs
1.25 c all-purpose flour
1/2 c whole wheat pastry flour
1/2 t cinnamon
1/4 t nutmeg
1/4 t cardamom
1/4 t fennel seeds, ground with the mortar&pestle
1 t salt
1 t baking soda

Preheat the oven to 350F and butter and flour a loaf pan. Put the figs, water, and teabag in a bowl and let steep together while you mix up the cake. To do so, cream together the sugars, oil, and eggs in a large bowl. Combine the dry ingredients (everything else) in a small bowl, then mix into the wet ingredients. Lift the fig parts out of the tea and plop them into the batter. Discard the teabag and pour 1/4 c of the tea-fig liquid into the batter too. Stir gently to mix, then pour into the loaf pan. Bake for about an hour until a toothpick comes out clean.

While it's baking, simmer the leftover tea-fig liquid (with a few remaining fig bits you missed at the bottom, and maybe a squeeze of honey) in a small saucepan until reduced (about 20 minutes). Mush the fig paste up with a spoon until it's as smooth as it's going to get. When the cake is done, let it cool in the pan for a few minutes, then remove from the pan and let cool on a cooling rack. While the cake is cooling, spread the fig paste on the top in a thin even layer (although some parts are chunkier than others). When fully cool or at bedtime, wrap in parchment then in foil, and take to work with creme fraiche the next morning. Happy birthday Yael!

Sunday, June 26, 2011

Mexican chocolate or cookie dough ice cream

How can an ice cream be either Mexican chocolate or cookie dough, you ask? Well, I was going for a cookie-dough-less yet cookie-dough-flavored ice cream, with chunks of cookie-like things and chocolate-truffle-like things in a snickerdoodle-like base. But I put a wee dram too much cream in the chocolate, and added the chocolate to the ice cream when it was a wee bit too hot, so some of the chocolate melted into the ice cream base instead of hardening into discrete truffly chunks.

On first taste, I was a little disappointed--it tasted amazing, just quite differently amazing than how I planned. Then I realized it's actually a lot like Mexican chocolate, because the tingle of the cinnamon stick and the dark richness of the browned butter come through the light chocolate quite nicely, and the contents of my mouth made much more sense.

So err on the side of using 2 T cream in the truffles and waiting 15 minutes for it to cool for cookie dough ice cream, or 3 T cream and 10 minutes for Mexican chocolate ice cream. (And let me know if the suggested cookie dough method actually works.) Makes almost 4 cups.


2 T + 1 T salted butter
1.5 c half-and-half
1 cinnamon stick
2 egg yolks
1/4 c brown sugar
1 t vanilla
4 T + 2-3 T heavy cream
1/2 c 1% milk
2 TJs cinnamon graham crackers
1/4 oats
4.5 oz (6 squares) dark chocolate

Put 2 T of the butter in a small or medium saucepan over medium heat, and cook for quite a few minutes until light brown. Add the cinnamon stick, turn the heat down to low, and cook for another couple minutes until golden brown or even a bit darker. Pour in a splash of the half-and-half, let it finish sizzling, then stir in the rest of the half-and-half. Keep over low heat to scald and infuse the half-and-half.

You have a few minutes before the half-and-half scalds, so use that time to separate the eggs and beat the sugar into the egg yolks until pale and barely grainy. When the half-and-half is ready, turn off the heat and scoop out the cinnamon stick. Add a few spoonfuls of the half-and-half to the egg mixture and stir to temper the eggs, then add about half of the half-and-half and stir. Pour the egg mixture back into the rest of the half-and-half, put over low heat, and stir constantly for a few minutes until it thickens up (mine started fairly thick and got even thicker). Pour through a metal strainer into a bowl, and stir in the vanilla, 4 T cream, and milk. Cover and stick in the fridge for at least an hour.

While you're waiting, make the chunks. For the "cookie" bits, grind together the graham crackers and the oats in the food processor until fine. Add 1 T butter and process until you can pinch it together into chunks; add a bit more butter if it seems too dry. Just before you're ready to churn the ice cream, combine the chocolate and 2-3 T cream in a small bowl, microwave for 30-40 seconds, and stir until smooth.

Pour the custard into the ice cream maker and start churning. After 10-15 minutes, glop in the chocolate truffle mix. Also around minute 15, pinch together bits of the "cookie crumbs" and drop them into the ice cream. Churn for another 5 minutes, scoop into a quart-sized tupperware, and freeze.

Wednesday, June 22, 2011

Peppery bay leaf pasta

Lester and Laura figured out that the branches poking through our back fence from the neighbor's yard belong to a bay tree. I've never used fresh bay leaves before, but solstice is a good day to try new things, right? As is every other day. They smelled amazing at the start, but the flavor wasn't quite strong enough to hold its own in the face of so much starch. Once we get through a bit more of the ice cream backlog in the freezer, there will be bay ice cream, which should be a much better backdrop for the herbal flavors.


5 fresh bay leaves
3/4 t red pepper flakes
olive oil
1/2 large white onion, minced
2 c whole cherry tomatoes
1 can cannellini beans, well rinsed
1/3 pack TJs mini cheese ravioli
watercress, pine nuts

Tear the bay leaves up a bit, and crush them with the red pepper flakes. Heat a generous pour of olive oil in a pot on medium heat. Add the onion and herbs/spices and cook for 10 minutes, stirring occasionally. Add the tomatoes and cook, covered, for 15 minutes, stirring occasionally. Some of the tomatoes will fall apart but others won't; that's fine because it gives the onions more time to caramelize without much liquid around. You can start cooking the pasta in some salted water while you're waiting for the tomatoes to cook. When you're satisfied with the onions and tomatoes, crush them up with a potato masher to make a thick sauce; add a tablespoon or two of the red wine you're drinking if it looks too dry. Stir in the beans and cook until the pasta is done. Drain the pasta and add it to the sauce, and keep everything warm until Lester gets home from soccer. Garnish with watercress and pine nuts.

Tuesday, June 21, 2011

Limoncello, day II

4 c white sugar (or 1 c white sugar + 5.5 c powdered sugar if you're low on white)
3 c water
jar of lovely yellow booze + tasty boozy lemon peels that's been sitting for a month and a half
coffee filters
the instructions page

Combine the sugar and water in a saucepan. Heat until boiling, and boil for 5 minutes. Let sit to cool, at least an hour or overnight. Mine was cloudy, as you can see, and I'm not sure whether or not that's a good thing.

Pour the limoncello through coffee filters into a large bowl. Dump out all of the lemon peels and put in a jar for safekeeping (cocktail garnishes? candied lemon peels? we shall see). Rinse out the now-empty jar. Pour the limoncello through more coffee filters back into the jar.

You should now have this:

Pour the simple syrup into the limoncello. You should now have this:

I think the denser syrup will sink to the bottom and separate. But maybe the alcohol will break down the sugars a bit and it will recombine? I'm curious to see what happens. Regardless, starting with a clear simple syrup may be the way to go.

Sunday, June 19, 2011

Mole

The ingredients list for this was taken from a few different recipes, and the modifications weren't done with any particular intention. The resulting sauce is richly flavored with barely any heat, with a texture that's both smooth and grainy. It worked well in a veggie-taco context and leaves plenty left over for trying with other things (maybe tofu mole burritos?).


3 large dried pasilla peppers
1 medium white onion, sliced
6 cloves garlic
2 t cumin seeds
2 t coriander seeds
1 t oregano
1 t chili powder
1 T canola oil
3/4 c sliced almonds
1 nice thick slice challah
1.5 oz Ibarra chocolate, chopped
1/2 c raisins (or 1/4 c raisins + 1/4 c currants if that's what you have)
1 14-oz can tomatoes
2 c broth
salt and chili powder to taste

thinly-sliced veggies (crimini or portabella mushrooms, colorful round summer squashes, red pepper)
pinto beans
tortillas
sour cream
cabbage salad

Slice each pasilla pepper in half, remove the seeds and stem, and tear into a few pieces. Heat a small dry frying pan over medium heat and toast the peppers until they turn from a very dark purple-red to a lighter orange. Transfer to the food processor, add the rest of the chili paste ingredients (onion through chili powder), and process until smooth; this requires scraping down the sides a few times and the spices still may not get ground up terribly well. (Makes about 1 c chili paste.)

In a large pot, heat the oil over medium. Transfer the chili paste to the pot, turn down the heat to medium low and stir to incorporate the oil, and let cook while you assemble the next step. (Don't start washing the frying pan or the food processor yet, you'll be using these again right now.)

Toast the almonds in the dry frying pan over medium-low heat, and transfer to the food processor. Toast the challah in the pan (or just in the toaster like normal). Tear the challah into a few pieces and add to the food processor. Add the chocolate and grind until fine. (Makes about 1 c crumbs.) Stir into the chili paste and keep cooking.

Put the raisins in the food processor, and process until mushed up. Add the tomatoes and process until relatively smooth. (Makes about 2 c tomato sauce.) Stir the tomato sauce into the paste, then stir in the broth and a bit of salt. Simmer over low heat for at least half an hour, until much of the liquid has evaporated to leave about 4 c of nice thick sauce. (I actually left it for more like an hour and a half and didn't taste it until the end, but visually not much changed after the first half hour.)

While the mole is thickening, spend some time as the light leaves the backyard calling Dad and helping Lester tie up some new rigging for the tomatoes. At some point you should also prepare the rest of your dinner: cook the veggies and beans, warm up the tortillas, get the sour cream and cabbage salad out of the fridge. Assemble however strikes your fancy.

Mexican-style cabbage salad

The original idea was to have this on fish tacos, but I went the fake meat route instead. (The fake chicken things are a bit weird on their own, but I've found quite a few good uses for them by slicing them and putting them in things.) This makes a lot though, so you should eat a bunch of salad on its own too.


1/4 c lime juice from 2 limes
1 red onion, thinly sliced
1/2 head green cabbage, thinly sliced
1 yellow pepper, thinly sliced
1/2 c cilantro leaves, coarsely chopped
salt and chile powder to taste
1 avocado, thinly sliced

Toss the red onions with the lime juice in a large bowl, and let sit and mellow together while you chop the rest of the veggies. Add everything except the avocado to the bowl and toss well to combine. Add the avocado and toss gently.

Wednesday, June 15, 2011

Purple dinner: beet burgers on homemade buns with blue potato fries

The pictures do not do justice to the deliciousness of this meal. Lester found this recipe as an idea for using up some beets and tofu we had around, then got all excited about having an all-purple-all-the-time meal and suggested making french fries with the blue potatoes he had lying about. I hadn't made bread in a while, so I decided to make the buns too (a consensus of these and those). The buns were the limiting factor here--everything else can be done between when the dough starts rising and when the buns come out of the oven--so if it's a warm day like it was today then this doesn't take unreasonably long. I highly recommend any of the components on their own too: the buns were soft yet sturdy, the fries were crispy on the outside and fluffy on the inside, the burgers were flavorful and held their shape, everything was really just spot on. One burger apiece was plenty with fries and salad on the side, so the three of us had three burgers and five buns leftover.


hamburger buns:

1 c warm water
1/4 c milk
2 t yeast
1 egg
2 T sugar
3.5 c all-purpose flour (plus a bit for dusting)
2 T softened salted butter
1 t salt
melted butter for brushing


Whisk together the wet ingredients (water through sugar) with a fork. In a large bowl, squeeze the flour, butter, and salt together with your hands until slightly crumbly. Pour in the wet ingredients and knead for several minutes; the dough will come together but still be sticky. Place in a spray-greased bowl, cover with a plastic bag, and place in the sun to rise for an hour. (Now's a good time to start roasting the beets and boiling the potatoes.)

When doubled, turn out onto a lightly floured surface and knead gently to deflate. Line a large baking sheet with parchment. Cut the dough into eight pieces (or more, these were large), roll each into a ball, place on the parchment, and flatten a bit with your fingertips. Let rise for another hour. (Now's a good time to finish assembling the burgers.)

Preheat the oven to 375F and place a pan of water on the floor of the oven. Brush the tops of the buns with melted butter. Bake for 16 minutes until golden on all sides but still very soft. (Now's a good time to fry the potatoes, and you can stick the burgers in the oven at the same time.) Transfer to a cooling rack, separate from each other if needed (mine are all angular because they rose into each other in a hexagonal-close-packed arrangement), and brush with a bit more butter so they stay soft.


burgers:

2 medium beets
half a head of garlic, peeled
quarter of a yellow onion, peeled
one large purple bulb from a spring onion, peeled
olive oil
1/2 c walnuts
9 oz firm tofu
2 t nutritional yeast
2 t soy sauce
1.5 T ground flax seeds
1/2 t paprika
2 t cornstarch


Preheat the oven to 350F. Wrap each beet in foil and place on a baking sheet. Place the garlic and onions (feel free to substitute with whatever onion-like substances you have around) on another piece of foil, pour on some olive oil to coat, wrap up the package, and put it on the baking sheet too. Roast everything for about an hour.

While you wait for the beets to cool down enough to peel, dump the garlic and onions with their oil into the food processor. Add the walnuts and grind until fine. Add the rest of the ingredients and process until homogenous, then scoop into a bowl. Peel the beets by rubbing the skins off under cool running water. Put the beets in the food processor and pulse until finely chopped but not juiced. Stir the beets into the rest of the mixture until everything is bright pink.

Preheat the oven to 375F--the same temperature as the buns could be baking at, not coincidentally. Line a baking sheet with parchment and spray thoroughly with spray grease. Plop 6 equal-sized lumps of burger mix onto the parchment and pat into rounds with your fingertips. (These burgers were the same size as the buns, but if you make smaller buns then make smaller burgers.) Spray the tops of the burgers with more spray grease. Bake for 15 minutes, flip with determination onto the same baking sheet, and bake for another 15 minutes. We served these on toasted buns with mayo, sliced heirloom cherry tomatoes, sliced pickles, and Little Gems leaves, but all sorts of other toppings would work well too.


fries:

one or two blue potatoes per person
canola oil
sea salt

Wash the potatoes well and slice in half the way that maximizes the surface-to-volume ratio. Boil in a few inches of water for 5-8 minutes until just barely tender, and certainly on the side of not falling apart as these potatoes are wont to do. Slice into wedges or sticks, and leave on the cutting board to cool and dry for a while.

When it's just a few minutes until dinnertime, heat some oil in a pot to 350F (plus or minus at least 20 degrees for me). I got away with using a bit less than a pint of oil in a medium saucepan, just barely enough to submerge the tip of my candy thermometer, but more is presumably better. Deep-fry the potatoes in batches for 4-6 minutes; more is not better here because it starts becoming all crispy outside without the fluffy inside. Drain on paper towels, toss with sea salt, and serve hot with ketchup or whatever you like.

Wednesday, June 8, 2011

Japanese curry with veggies

I've used this curry base a couple times recently after I remembered that it's fast, easy, flexible, and tasty. Before a few weeks ago, I hadn't had it for years, not since I lived with Jessica and Brandi. (Theirs was soupier and usually just contained carrots and potatoes--also a good way to do it.) This time I went with fresh local tofu, which is totally worth it.


cooked rice for two, plus a bit for leftovers
canola oil
1 spring onion, white and green parts sliced
several mushrooms, sliced
2 carrots, sliced
half a bunch of Chinese broccoli, stems and leaves chopped
3 cubes Japanese curry base, coarsely chopped
hot water
1 block medium tofu, cubed

Cook the rice and chop the veggies, this will go fast once you start cooking. Heat some oil in a pan or wok over medium heat and saute the white parts of the onion. Add the mushrooms and fry until cooked through. Add the carrots and greens and cook until almost tender. Add the curry and stir until the cubes start breaking down a little bit. Pour in some water, enough to make it as soupy as you want it to be, noting how the curry makes the sauce thicken up as you simmer it. When you're happy with the amount and thickness of the sauce, gently stir in the tofu and the green parts of the onion, and simmer until the tofu is warmed through.

Sunday, June 5, 2011

Vegan ice cream cake: peanut butter brownie

So you know how in the last ice cream cake post I made it sound like I wouldn't be making another one any time soon? Totally false. They're just so much fun to think about, fun to make, fun to eat...and LauraR's birthday is coming up so I even have a good excuse. After trying my peanut butter cup ice cream she requested another chocolate-peanut butter dessert, but also wanted something low on the lactose scale. So for a bit of a challenge, I decided to go vegan, but if you aren't serving actual vegans then I recommend adding the optional layer of extremely non-vegan chocolate truffle ice cream.

The dense, rich brownies are based on these, with the addition of crushed cookies because ice cream cakes are better with a bit of crunch. This convinced me that a straight coconut-milk ice cream could work, and the flaked chocolate method is like my mocha chip ice cream; a coconut flavor is present but the peanut butter and chocolate flavors dominate. The topping, similar to peanut butter cup filling but a bit goopier, is from a recipe that LauraK clipped from the Spokane newspaper.

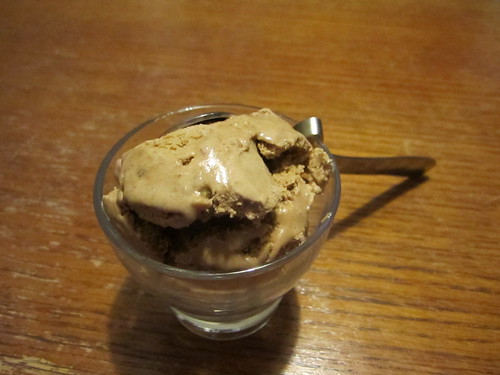
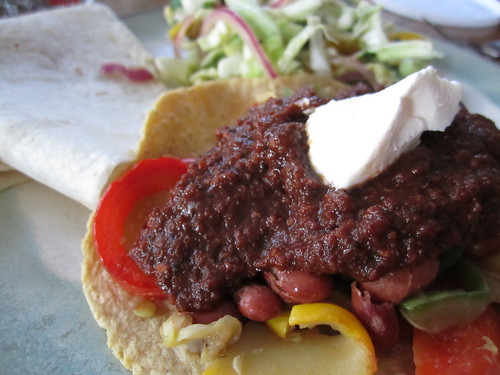
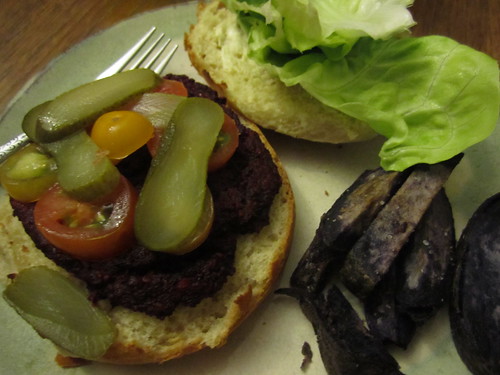
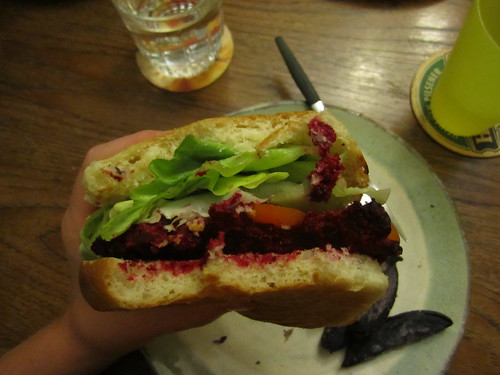
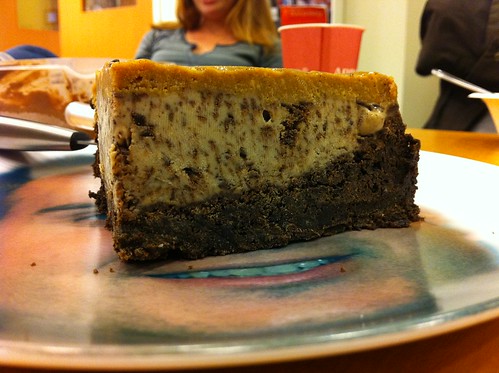
(That plate is super weird isn't it? I didn't quite catch why the birthday girl's lab had that lying around.)


brownie base:

1/2 c coconut oil
1/2 c earth balance
4 oz dark chocolate (9 squares of TJs pound plus bar)
1 t vanilla
2 t instant espresso powder dissolved in 1/2 c hot water
1.5 c sugar
2 T flax seeds (ground)
6 T hot water
1 c cake or pastry flour
1 c whole wheat flour
3/4 c cocoa powder
1 t baking powder
1 t baking soda
1 t salt
2/3 c crushed chocolate cookies (from 8 TJs Joe-Joes, insides reserved)

Preheat oven to 350F and grease a 9" springform pan and a loaf pan. Combine the coconut oil, earth balance, chocolate, and vanilla in the top of a double boiler or equivalent, and stir until smooth. Stir in the coffee and sugar, remove from heat, and stir until the sugar is mostly dissolved.

In a little bowl, combine the flax seeds and hot water, and let sit while you make the batter. In a large bowl, stir together the dry ingredients (flour through salt), then stir in the chocolate mixture until just combined. The flax seed egg replacer should be thick by now; stir it into the rest of the batter along with the cookies. Divide between the two pans, giving them the same depth of batter, and bake for 35 min. When cool, eat the brownies in the loaf pan, and save the 9" round for the ice cream cake.


peanut butter chip ice cream:

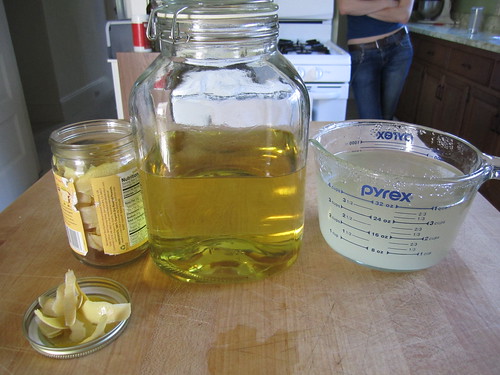
2 14-oz cans coconut milk (not the light kind! 14 g fat in 80 ml)
3/4 c peanut butter (creamy, no-stir)
3/4 c brown sugar
1 t vanilla
6.5 oz dark chocolate

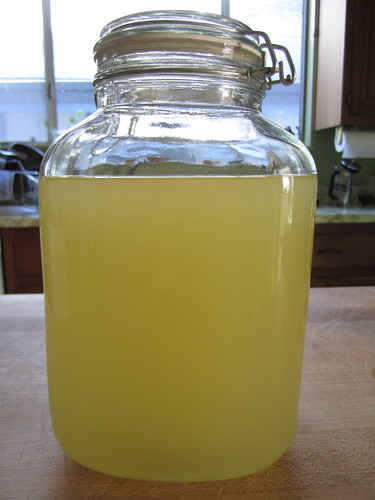
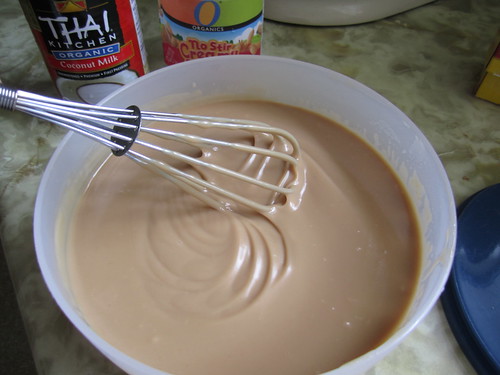
Combine the coconut milk, peanut butter, and sugar in a heavy saucepan. Heat over medium and whisk until smooth. Keep heating until it starts simmering, then keep heating and whisking for 5 or more minutes until the mixture becomes quite thick. Pour through a strainer into a large bowl and let cool on the counter for a while. A skin of peanut butter gunk and other oils will form on top as it cools, but if you whisk it everything with become lovely and smooth again (the picture is from after this whisking, note how thick it is). When it's cooled to room temperature, cover and chill in the fridge for several hours.


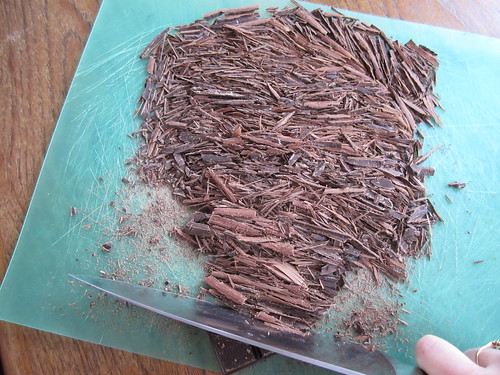
Shave the chocolate with a large sharp knife on a large cutting board. Churn the peanut butter mixture for 10 minutes, add the chocolate, and churn for 5 more minutes. (Turns out the chocolate puts this slightly over the capacity of my 3-pint ice cream maker, but not catastrophically so.) Scoop into a large flat tupperware and freeze.


peanut butter cup topping:

12 graham crackers
2/3 c powdered sugar
insides of 8 TJs Joe-Joes
1/3 c earth balance, softened
3/4 c chunky peanut butter

Grind the graham crackers in the food processor. Add the other ingredients in order, pulsing until smooth after each addition and scraping down the sides.

assembly:

Have on hand a 9" springform pan, some plastic wrap, a cold brownie layer, frozen then softened ice cream, and the topping. Line the pan with plastic wrap and place the brownie on the base. Snap on the sides of the pan, draping the plastic wrap over the sides. Scoop on lots of ice cream (I used about 3/4 of the batch) and even out the top. Spread on a thin even layer of the peanut butter topping. Fold the plastic wrap over the top to seal against freezer-burn and keep in the freezer until ready to serve.

Thursday, June 2, 2011

Ice cream cake: carrot cake with cheesecake ice cream

Ice cream cake, I finally made an ice cream cake! It's a delicious endeavor quite worthy of cake month, but sufficiently nontrivial that I should probably save my many other ice cream cake ideas for future special occasions (hopefully happier ones than housemates moving out). This time I started baking on Monday evening for a Thursday evening dinner, but the schedule could have been drastically compressed--you could even do it all in one weekend day to serve that evening if you really wanted to. On the other hand, if you have plans in the evenings and maybe feel like you should get some non-food-production work done during work hours, all the steps (besides the eating part) can be spread over several days ahead of time.

That said, this wasn't *actually* that complicated, and I say that as a first-time tort-er. I used the cake slicer that came in Toni's cake decorating kit and it worked as well as I could have hoped. The cake is pretty much this, and the ice cream is based on one from the booklet that came with my ice cream maker (Lebowitz's is also similar).


cake:

1 c brown sugar
1/2 c unsweetened applesauce
1/3 c canola oil
3 eggs
1.5 c flour
1.5 t baking soda
1 t salt
1 t cinnamon
1 t allspice
1/2 t cloves
2 c finely grated carrots, packed (4 medium carrots)
3/4 c walnuts, coarsely chopped
1 T peeled grated ginger

Preheat the oven to 350F. Prepare a 9" round pan by buttering the bottom and sides, lining the bottom with parchment, buttering the parchment, and dusting it all with flour. Grate the carrots and ginger, and chop the walnuts (you might want to chop them a bit even if they're "pieces"); stir those together and set aside.

Time for the actual cake part: in a large bowl, stir together the sugar, applesauce, and oil. Add the eggs and stir until well combined. Stir together the dry ingredients (flour through cloves) in a 2-c pyrex, then stir into the batter until just combined. Stir in the carrots, ginger, and nuts. Pour the batter into the pan and bake in the middle of the oven for 40 minutes until a toothpick comes out clean.

Cool in the pan on a cooling rack for 15 minutes. Carefully turn the cake out onto a second cooling rack and peel off the parchment. When the cake is completely cool, wrap tightly in plastic wrap, place back in the pan for stability, and stick in the freezer until ready for assembly.


ice cream:

1 c sour cream
4 oz cream cheese
8 oz mascarpone
3/4 c sugar
1/4 c Drambuie
1/2 t salt
zest of 2 Meyer lemons
3/4 c half-and-half

Whip everything together until smooth, cover, and put in the fridge for a couple hours. Churn the ice cream maker for 25 minutes and put in the freezer in a wide flat tupperware (maximal surface area now means more uniform softening later).


assembly:

6 cubes crystallized ginger
1 c walnuts
8 cinnamon graham crackers

Remove cake from the freezer, unwrap the plastic wrap, and let defrost about half an hour. When the cake seems soft enough to cut, carefully tort it aka slice in half horizontally (with a fancy tool if you have one). This worked well as a two-person job, with one person using the two-handed cake slicer and the other person holding the cake so it didn't slide all over the cutting board. Grind the ginger in the food processor, then add the walnuts, then the graham crackers, processing into uniformly small chunks. Remove the ice cream from the freezer and check for spreadability; defrost on the counter if it's too hard.

Line the base of a 9" springform pan with plastic wrap, leaving enough hanging off the sides that you'll be able to cover the whole thing when you're ready. Transfer the whole cake in just-cut geometry onto the pan base, flat side down. Carefully transfer the top layer onto a cutting board and set aside. Attach the sides of the springform pan and drape the plastic wrap over the sides. Spread about 1/3 of the ice cream (1.5-2 c) in an even layer on the cake. Transfer the other cake layer onto the first ice cream layer, and spread on another layer of the ice cream (leaving you with the rest for another occasion). Cover with the topping and press as if you were forming a graham cracker crust. Fold the ends of the plastic wrap over the top of the cake, cover the whole pan with another layer of plastic wrap, and put the package in the freezer.


eat!

Remove the cake from the freezer 15 minutes before serving, remove the sides of the springform pan, and peel the plastic wrap from the top and sides of the cake. Serve as a grand finale to Lizzy's last house dinner :(.